The Remote Control Project of Home shack
== STEP 6 ==

[The last renewal of this page: June 16, 2009]
STEP 6. Remote Control of the Antenna Rotor
This job has been well practiced by sevral pioneers already, and I could get useful relative informations on the Internet. So, everything was very smooth to achieve this.
I bought a Kit called "USB-An"(A/D converter + USB I/O unit) from Km2Net, and assembled it, and downloaded an excellent controll free software deigned by JE6LAO, and gave it a try to run.
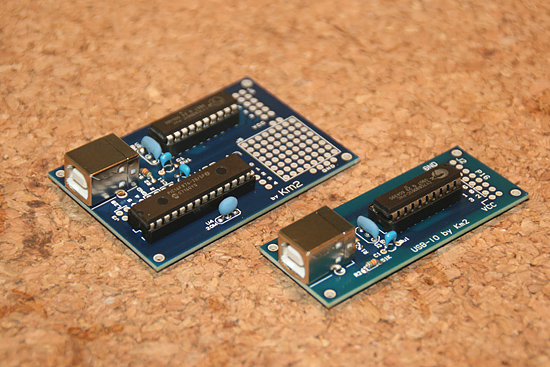
This is the USB-An and USB-IO supplied by Km2Net being assembled. As they have very few parts to mount on, I could comlete them very quickly. It is unbelievable to know that such excellent kits are sold by only JPY3,000(US$30.00) for USB-An, and JPY1,500(US$15.00) for USB-IO. Thanks a lot! A smaller one is the USB-IO, and is for later use for different purpose.
If you compare these two kits carefully, you may recognize that a half of USB-An is the same as USB-IO. The USB-An firstly work as converter from analogue to digital(Convert the DC voltage varied by potentiometer of the rotor which shows the rotation angle into digital levels.), and then on the other half of the board as USB-IO, accepts switching command from the PC to control the rotor swith.
I am planning to use the USB-IO for AC power swith control in the shack later.

This is the figure to show the connection with EMOTO 1200FX. If your rotor controller has an external socket, you may be able to use it refering to this. If your rotor controller does not have an external socket, you may need a little modifications on the PCB in the controller, but you can.
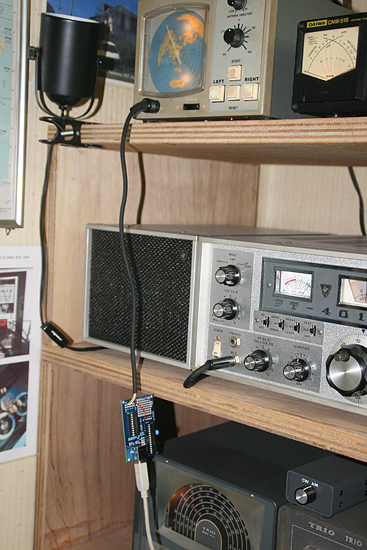
As EMOTO 1200FX has an external socket, nothing was difficult. Gave it a try as an experiment.
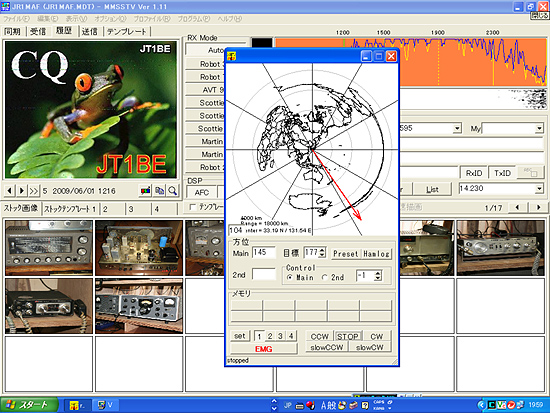
It works just perfect! Lovely! I tried to run RealVNC Viewer on the mobile PC and run rotor control software for remote control, but everything is fine. The VNC has now its moment for debut! For this purpose, nothing is problem with its speed.
 @
@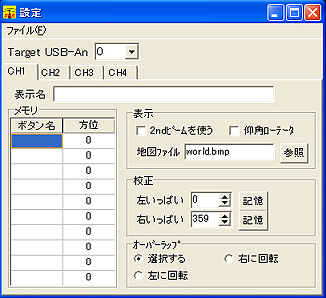
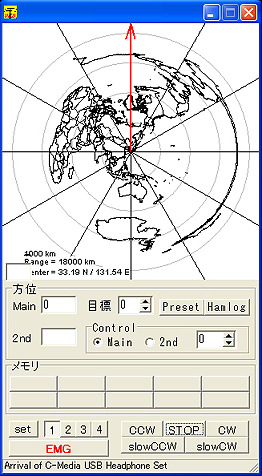
This software is well designed and has a preset function, and you can even change the map with your own. (VY TNX JE6LAO OM!)
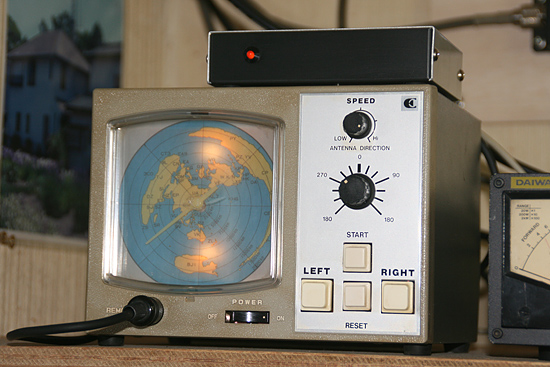
Install the PCB in a little cabinet and completed. (I finally added 10 microF capacitor between the direction line and the GND to avoid unstable indication of the direction.)
 In case you hit this page directly from a Search Engine, you can reach to all of the pages of MAFNET from Top Page