The Remote Control Project of Home shack
== STEP 3 ==

[The last renewal of this page: June 13, 2009]
STEP 3. Control the Radio from a PC on the Home LAN
So far, what you have done is only to control radio by PC. Nothing was in remote yet.
I started it from controling radio by another PC on the Home LAN. In my case, the optical fiber service "B-Filets" by NTT is the way to get to the Internet. An optical fiber came in my home is connected to the optical terminal to convert into the electlic signal, and then led to "WebCaster V110", a very common standard rental router of NTT. The router is connected to the Home LAN. Well, when we try to control equipments being connected to the Home LAN from out of the home, through the Interent, the problem maker is this router. A router is designed with the idea that human nature is inherently evil, and considers all the access from the Internet is evil, therefore it has a strong security function so that only the action which is especially permited only can get through. Browsing and Mailing are very fundamnetal functions and they only are considered to be good and permited to get through as default, but other special transactions are all blocked.
This was not easy to break the blocks. I have experienced this problme a lot when I started to run the EchoLink Node in my shack, so I decided to try control radio within my Home LAN, within the router as a first step.
First, run Ham Radio Deluxe on the PC being connected to the radio. Under this situation, radio is controlled by the PC in the shack. Ham Radio Deluxe has a function to be controlled by another Ham Radio Deluxe run on the defferent PC being connected to the PC in the shack with network.
To realize this:
(1) Ham Radio Deluxe run on the PC being connected to the radio in the shack should be swithed into the Server Mode.
(2) Ham Radio Deluxe run on the different PC should be run with normal mode.
On the PC being connected to the radio, select TOOL --> PROGRAMS --> REMOTE SERVERS at the menu of Ham Radio Deluxe. (or you can simply click the Remote Icon for the same effect)
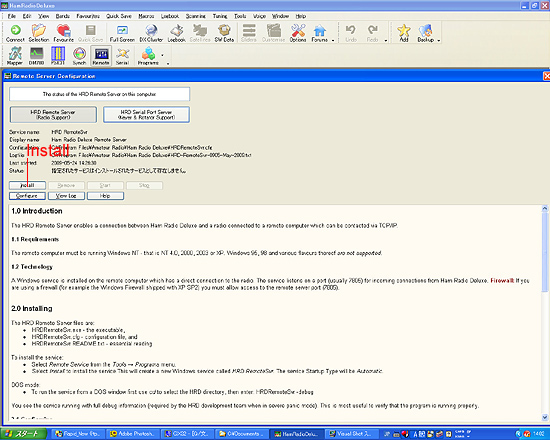
A setup window to run this Ham Radio Deluxe in Server Mode for the remote control is opened.
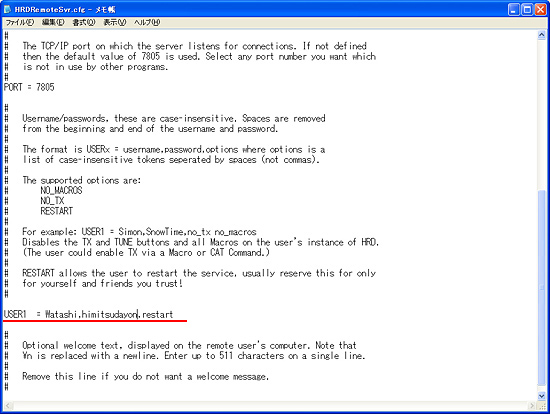
By clicking Install, a definition file is opened. Rewrite the line for the USER infromation with your own ID and password. (You have to do this essentially, otherwise a default example data will be used.)
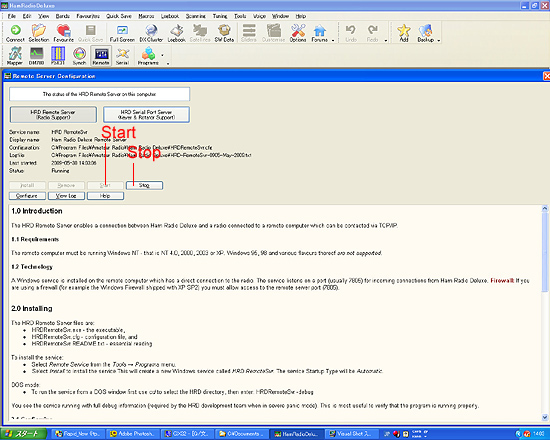
By clicking a Start, the Ham Radio Deluxe starts to run in Server Mode. The server mode never stop until you click Stop button next, in spite of closing Ham Radio Deluxe, or even rebooting your PC again. It runs in the background.
Then close the Ham Radio Deluxe. You have to watch out that even the Server Mode is running in the background, it does not work as long as Ham Radio Deluxe is running. You have to close it to have the server mode effective.
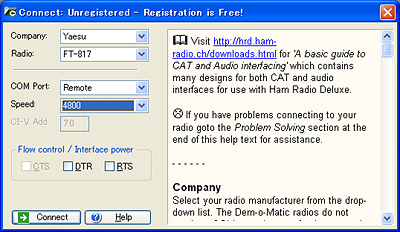
Then, run Ham Radio Deluxe on the PC within a Home LAN with which you try to control the radio. In the CONNECT window, at the COM selector, select Remote. At the Speed selector, you can choose Auto detect, but try to select 4800.(To avoid further problems, as we know the default speed is set to 4800 in the manual, select this speed directly.)
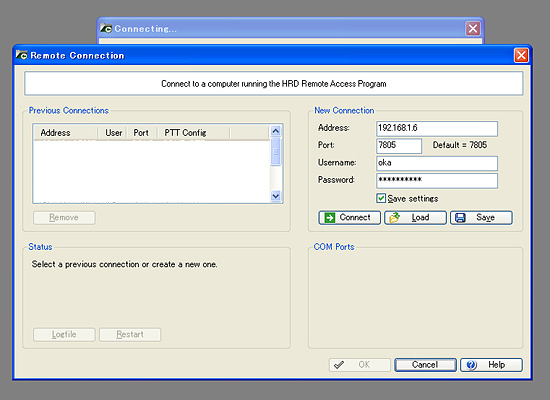
In the Remote Connection windows which opens the next, at the Address section, type the "Local IP Address"(** Please refer to the below) of your PC which is connected to the radio. Type Username and Password which you have difined before.

** Local IP Address is the address which is used within the Home LAN, and managed by the router to identify the individual PC being connected to the LAN. You open the Control Panel and select the Property of the Network Connection, and select the Property of TCP/IP to confirm or set up.
Normaly, it may be set to "Automatically get the IP Address". Under that setting, the router is to determine and set a certain IP Address with its free hand. You need to study a little here so that you could determine and set the IP Address you desired. All the necesarry data may printed in the document that you have received from the provider when you signed up, but if you are not sure about it, you may call up their customer service and ask them how to do it.
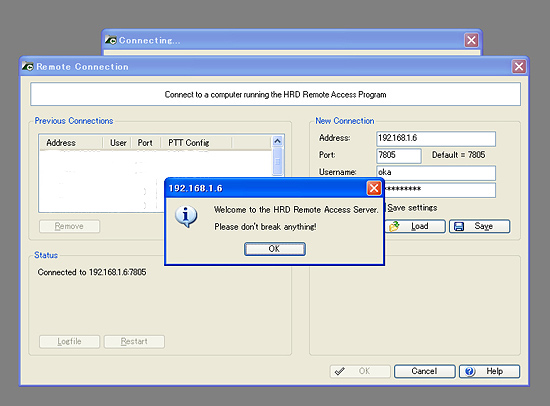
Back to the Ham Radio Deluxe window, after clicking CONNECT button, you would see a welcome message.
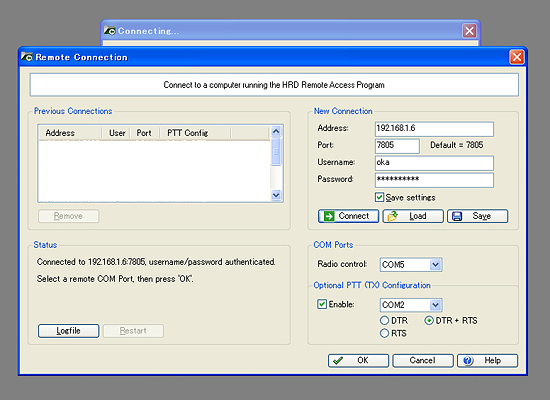
At the COM Ports section, select the COM No. which you are using for the connection with DATA socket of the radio at the PC which is connected to the radio.
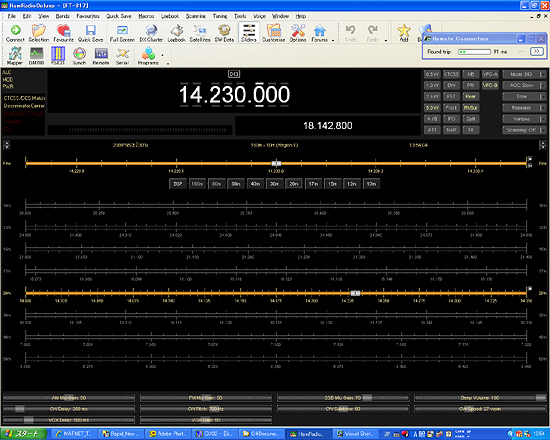
Click OK, and at last Ham Radio Deluxe runs being connected to the radio. This is the very first step of the remote control!
It is a little bit early to shout "Bravo!", because the radio is controlable, but you have no microphone nor speakers. You have no audio lines, hi hi.
So, the next thing to be used is a SKYPE. The SKYPE is a free software that you can enjoy voice/video communications and a chat with all over the world via Internet. Many of you must be good users already. If you are not, visit SKYPE site and check how to use it, and download it.
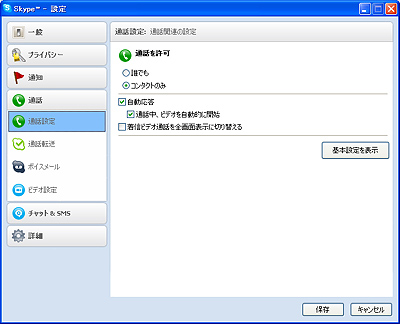
First of all, install the SKYPE software to the PC which is connected to the radio, with a new SKYPE name. Watch out! you have to pay attentions to keep it secret, and set not to accept any calls other than contact list. Please do not forget to set automatic reply.
That's it! Run SKYPE on the other PC with your own SKYPE name as usual, and give a call to the one you set on the PC being connected to the radio.
You'll get a responce for connection, and then good receiver sound will be coming on! (You need to adjust transmit/receive audio level and playback/record audio level of your sound card.)
With a full of expectation, click the TX button of Ham Radio Deluxe, and try to speak to the microphone being connected to the PC. You may see the power meter of the radio is swinging. (Don't forget to connect the dummy load at this stage.) Please check your audio monitoring with other receivers. As the audio is processed by digtal, it has some delay before transmission. So if you put headphones on your both ears, you may not be able to speak words correctly. (Human brain is very strange!) Use one side of headphones to monitor.
Well, so far, you have achieved the following:
(1) QSO in voice mode(SSB, etc.) from a diffrent PC connected to the Home LAN using PC's headset is available.
< In case you hit this page directly from a Search Engine, you can reach to all of the pages of MAFNET from Top Page